Adding inseminators and review results
If there are several inseminators on the farm, then it can be useful to record and monitor. Here, we will give you a short explanation of the settings and where you can see the check the results later.
Step 1: Go to [1.9] Supplier list
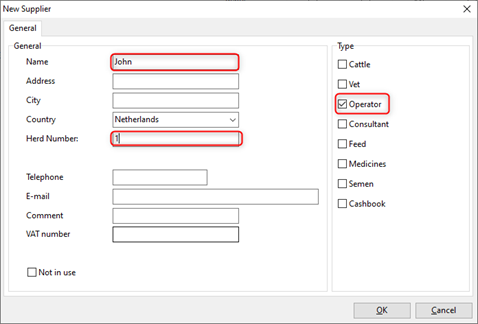
In the Supplier List, the inseminators must be added. To do so click “new” at the bottom left and make sure to enter something in the fields “Name” and “Herd Number” and that below “Type” the box is ticked for “operator”. Finally, click on “OK”:

Step 2: Go to system Settings-General settings
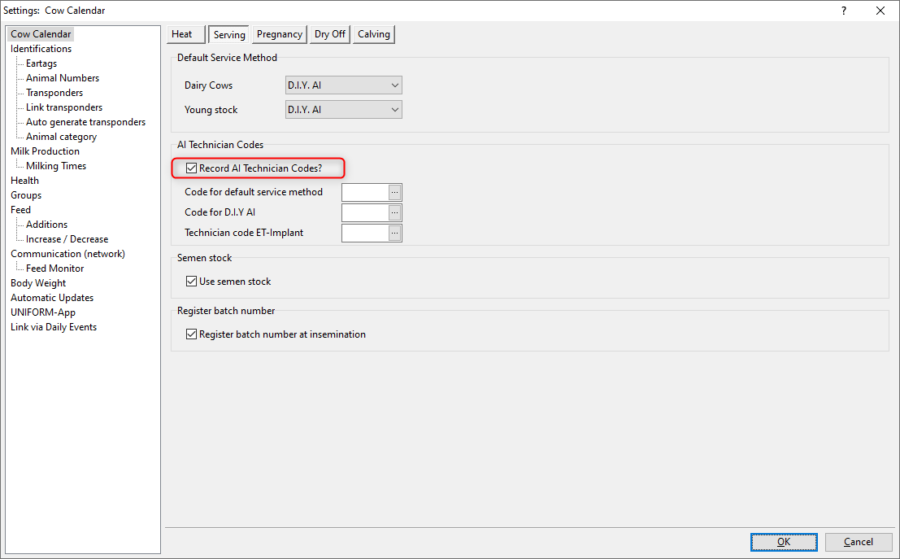
Then you go to ‘Cow calendar’ and the tab ‘Serving’ and make shure that this box is ticked:

You can fill in the three entry fields below if you have a specific preferred code / inseminator
Step 3: Entering insemination (s) at Daily entry
From now on, when you enter an insemination in daily events, there will be an item added at the end: the inseminator code. There you can add the inseminator (code) for each breeding.
Step 4: Review results
If you’ve been working with entering inseminatons for a while in this way, then it is also be useful to see the results. Go to [3.11] Fertility KPI’s (US). In the second tab, the “Conception Rate”, it is possible to group by inseminator code (bottom left). Also in [3.7] Insemination analysis under the button “Summary”, the results per inseminator will be shown.

